Create a New Role
In the Accounts module, you can create custom roles to control access to different parts of the Xsponse platform. Roles define what actions a user can perform within each system module, such as viewing, creating, updating, or deleting records. Creating a new role involves naming the role and selecting the appropriate permissions for each module.
To Create a New Role
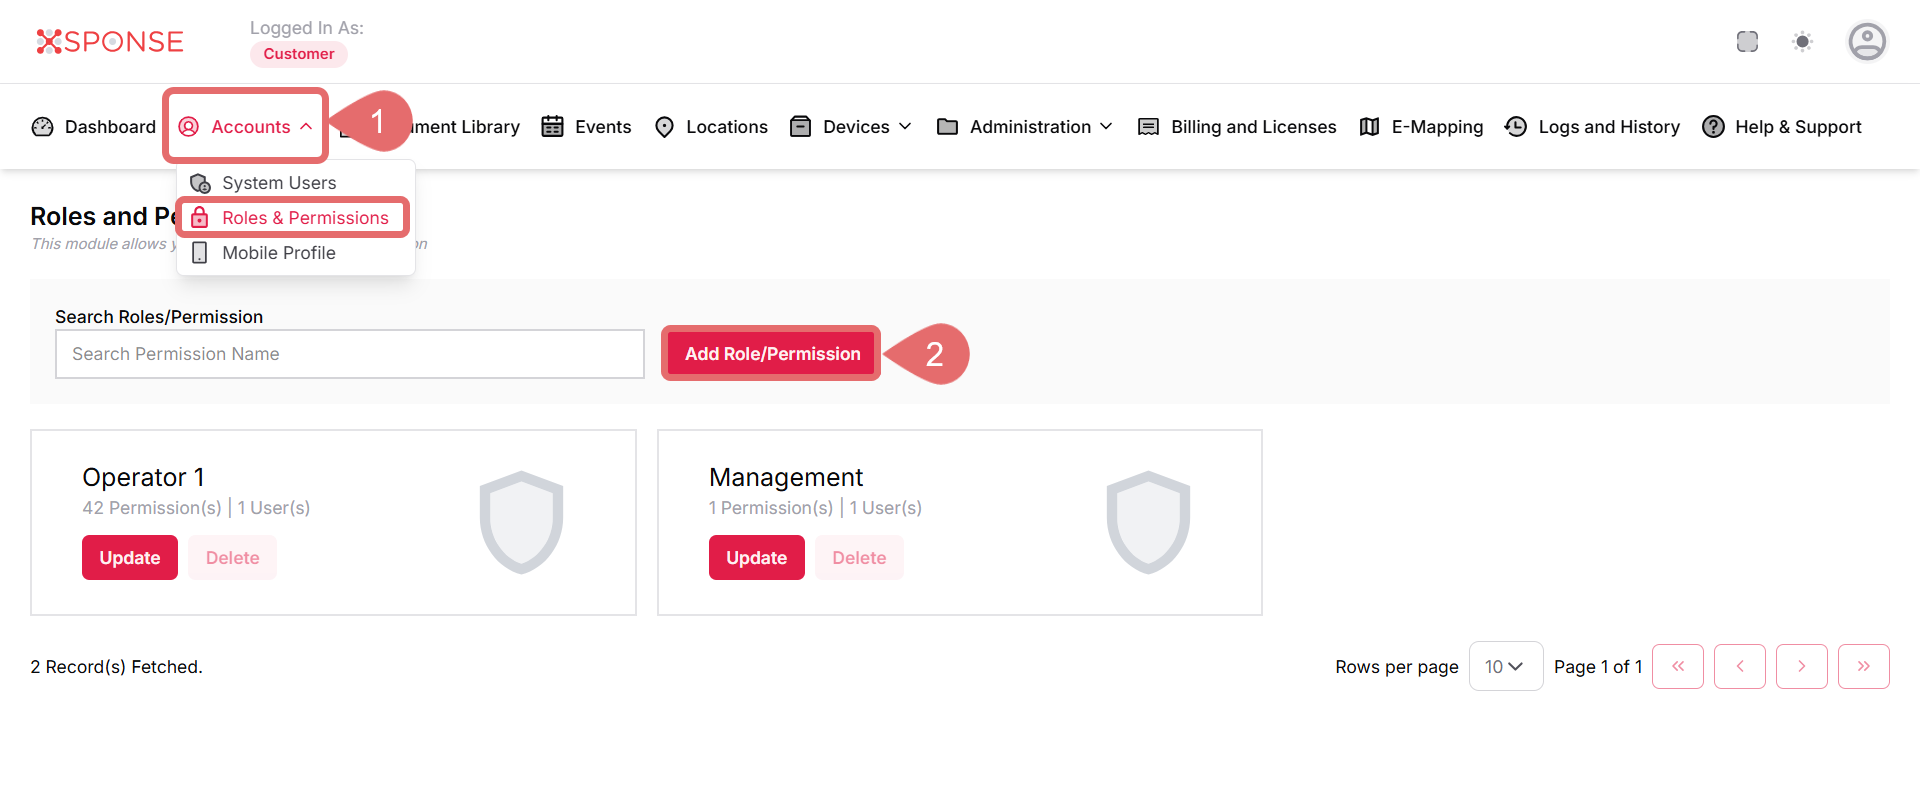
- Go to Accounts > Roles & Permissions.
- Click Add Role/Permission.
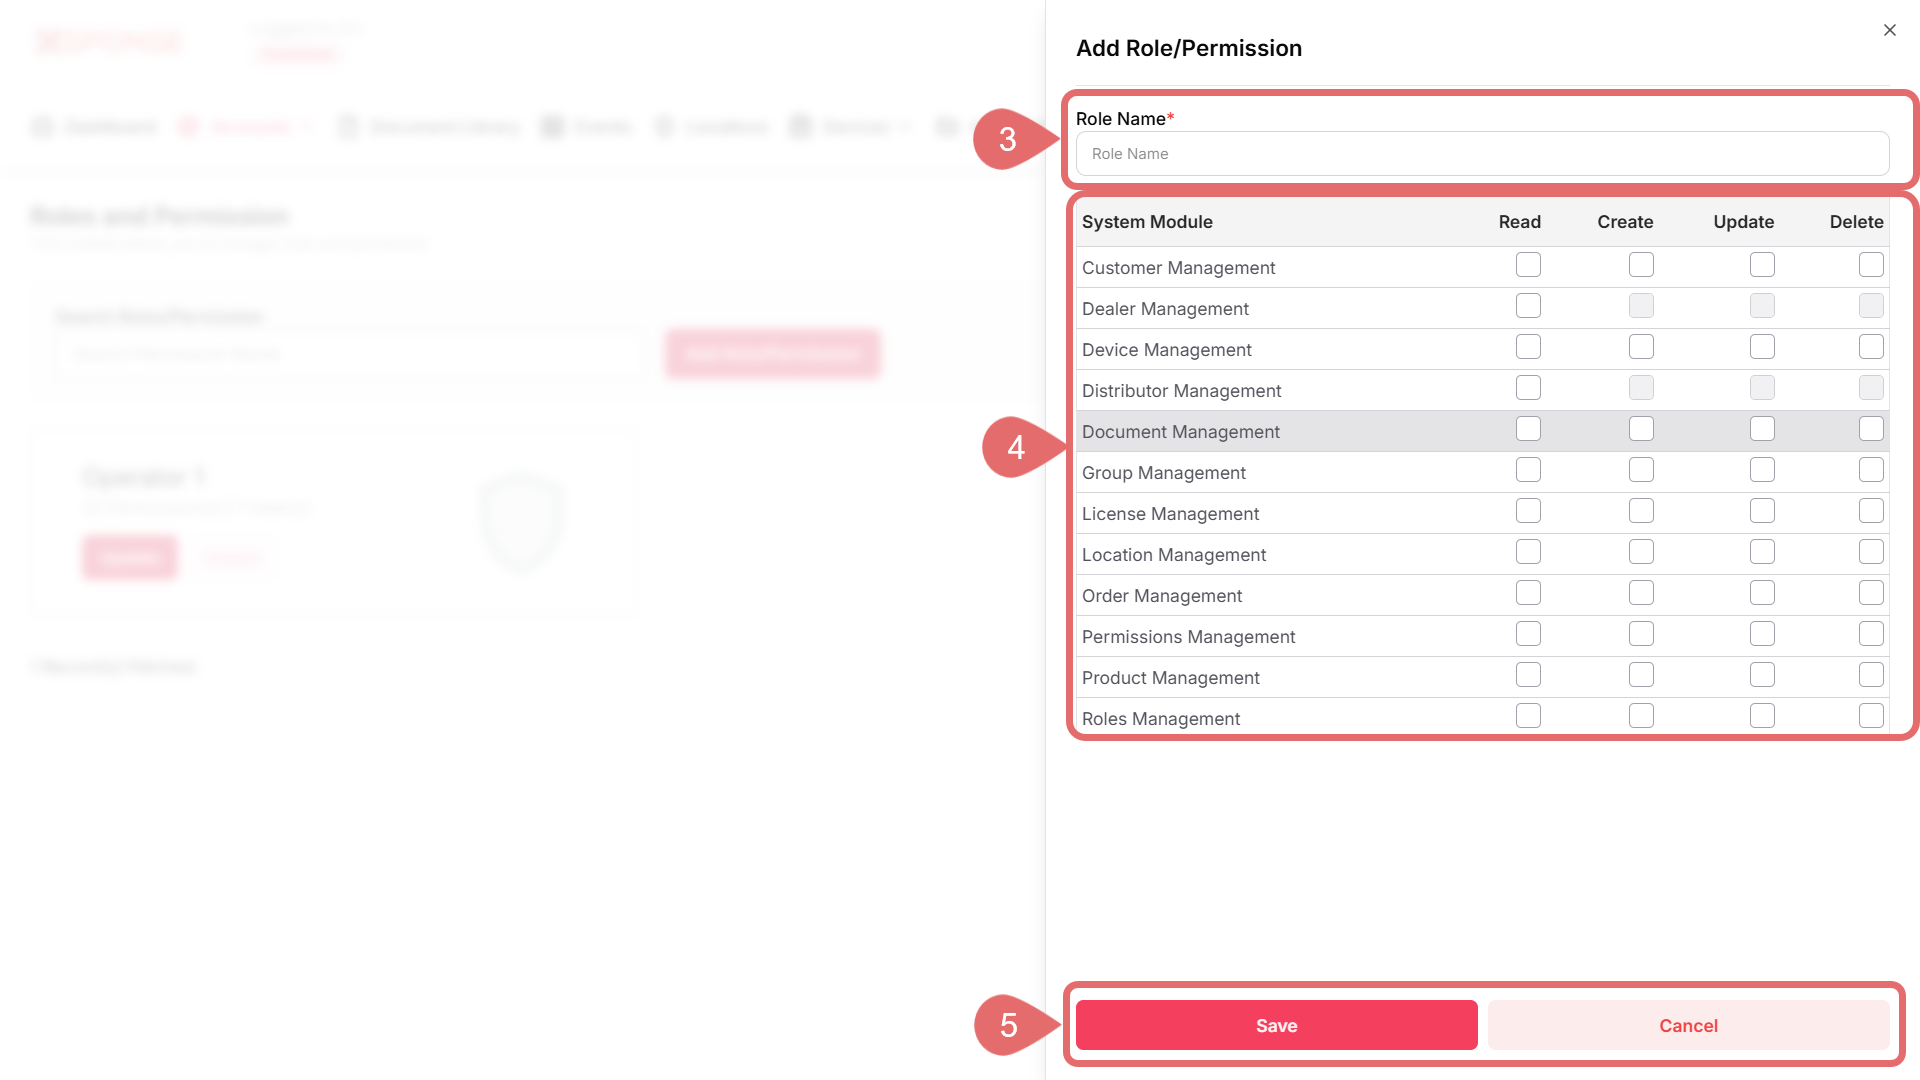
- Fill in the required information:
- Role Name: Enter a name for the new role. This field is required. Example: Operator, Manager, Support Team.
- Assign permissions for each module by selecting the appropriate checkboxes:
-
Read: Allows the user to view data.
-
Create: Allows the user to add new records.
-
Update: Allows the user to modify existing records.
-
Delete: Allows the user to remove records.
Available modules include:
-
Customer Management
-
Dealer Management
-
Device Management
-
Distributor Management
-
Document Management
-
Group Management
-
License Management
-
Order Management
-
Permissions Management
-
Product Management
-
Roles Management
-
- Click Save to complete the process, or Cancel to discard the changes.
Once saved, the new role will appear on the Roles and Permissions screen, where it can be assigned to users or updated later if needed.
See Also
To complement your knowledge of this process, check the following pages: